

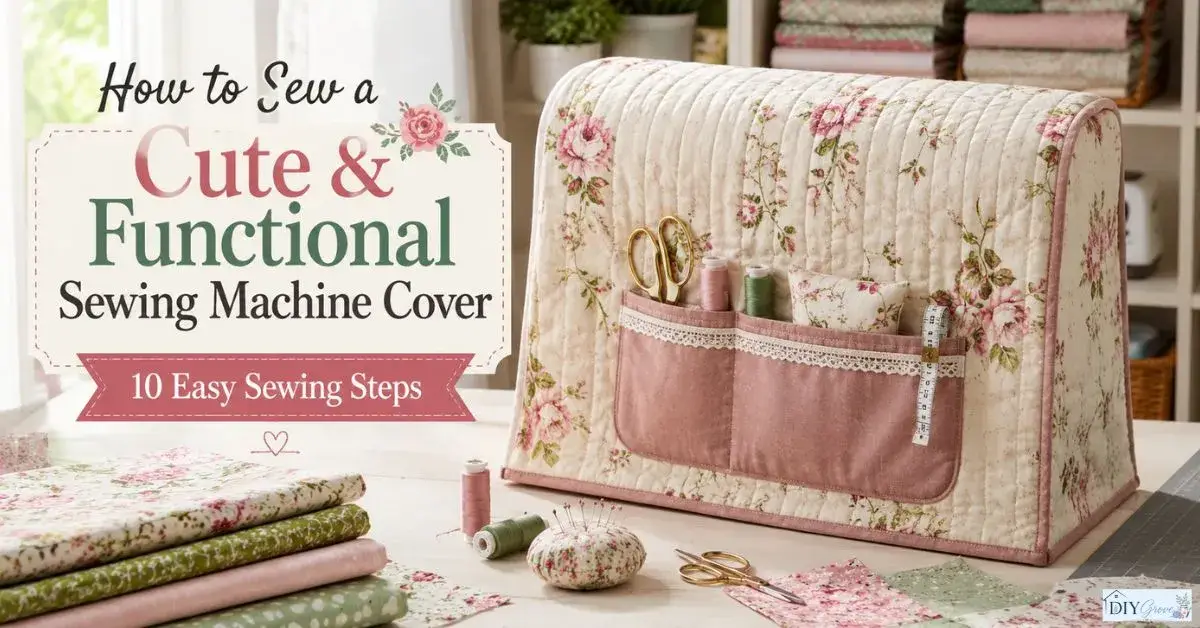
A sewing machine cover is an easy DIY project that protects your machine while adding a charming touch to your sewing space. If dust, fabric fibers, and everyday mess quickly collect around your machine, a handmade cover can keep everything looking cleaner and more organized. The best part is that you can choose your favorite fabric, add light padding, and personalize the design with pockets, quilting, or decorative details.
You do not need an advanced sewing skill level to make one either. With accurate measurements and a few basic supplies, you can create a practical cover that fits your machine beautifully. Grab your favorite fabric and get ready to sew something useful, stylish, and uniquely yours.
Why Make a Sewing Machine Cover?
A sewing machine cover is a simple project that can make your sewing space feel more organized while giving your machine everyday protection. A well fitted cover helps keep dust and loose fabric fibers away when your machine is not in use, which is especially helpful if your sewing area doubles as a craft room or home workspace.
The best part is that you do not have to choose between practical and pretty. You can pick a fabric that matches your sewing room, add simple quilting or a useful pocket, and create a cover that feels completely your own. With a few basic sewing supplies and accurate measurements, even a beginner can make a polished cover that is easy to put on and remove.
Materials and Tools You’ll Need
For this sewing machine cover, choose materials that are sturdy enough to hold their shape but still easy to sew. Cotton quilting fabric works beautifully for a decorative cover, while canvas or cotton blends can give you a more structured finish. If you want extra protection, lightweight batting or fusible fleece adds gentle padding without making the cover too bulky.
Basic Supplies
- Main fabric, enough to cover your machine with extra fabric for seams
- Lightweight batting or fusible fleece
- Coordinating sewing thread
- Measuring tape
- Fabric scissors or rotary cutter
- Quilting ruler
- Fabric clips or sewing pins
- Sewing machine
- Iron and ironing board
For a more personalized finish, keep a few optional supplies nearby, such as contrasting fabric for pockets, decorative trim, appliqué pieces, or a fabric label. Tip: Prewash your fabric before cutting so it does not shrink after your finished cover is made.
“If clutter tends to build up in other project spaces too, these DIY garage organization ideas offer the same practical approach to keeping tools and supplies tidy.”
Step By Step Guide to Sewing a Cute & Functional Sewing Machine Cover
Creating your own sewing machine cover is easier when you break the project into a few simple stages. The key is to start with accurate measurements, plan the shape before cutting, and keep each fabric piece clearly labeled. This helps you get a neat fit without wasting fabric.
1. Measure Your Sewing Machine for the Right Fit

Start by measuring your sewing machine while it is sitting in its normal position. Measure the width from side to side, depth from front to back, and height from the base to the highest point you want the cover to reach. If your machine has a handle, thread holder, or other raised parts, make sure your measurements account for them.
Add a little extra room to your measurements so the finished cover can slide on and off easily. A cover that fits too tightly can be frustrating to use, while a slightly relaxed fit makes it much more practical. Tip: Write your measurements down immediately and label each one as width, depth, or height before moving to the next step.
2. Create a Simple Cover Layout From Your Measurements

Before cutting any fabric, sketch the basic shape of your cover on paper. A simple design usually includes one large piece for the top and main body, plus two side panels. This layout makes it easier to visualize how the finished cover will sit over the machine and helps you catch measurement mistakes early.
Use your machine measurements to determine the size of each piece, remembering to include seam allowances. Keep the design simple if this is your first sewing project. A quick paper layout is worth the extra few minutes because it can prevent incorrect cuts and help you create a more balanced finished cover.
3. Cut the Main Fabric and Side Panels

Once your layout is ready, place the fabric on a clean, flat cutting surface and smooth out any wrinkles. Transfer your measurements carefully, then cut the main fabric piece and two matching side panels. Use a quilting ruler for straight edges and mark your corners clearly so the pieces are easy to identify during assembly.
If you are using a patterned fabric, pay attention to the direction of the print before cutting. Keep the pieces organized after cutting so the right sides and matching edges are easy to recognize later. Double check every piece against your measurements before putting the scissors away. This small check can save both fabric and sewing time.
4. Add Fleece or Batting for Extra Protection

Adding a lightweight layer of fusible fleece or batting gives your sewing machine cover more structure and a little extra protection from dust and accidental bumps. Place the stabilizing layer on the wrong side of the main fabric, keeping the edges aligned before securing it according to the product instructions.
Avoid thick batting that makes the cover stiff or difficult to sew. Lightweight fleece is often easier for beginners and creates a smooth finish without adding unnecessary bulk. Tip: Press the fabric carefully after attaching the fleece, making sure there are no wrinkles or loose areas before moving on.
5. Quilt and Personalize the Main Fabric

Now is the perfect time to give your cover some personality. Stitch simple straight lines, grids, or another beginner friendly quilting pattern across the stabilized main fabric. Quilting not only adds visual interest, it also helps keep the fabric and batting layers securely together.
For a cute finish, consider using a contrasting thread, coordinating fabric strips, appliqué, or a small patchwork detail. Keep decorative elements away from areas that will need to connect with the side panels. Choose details that complement your sewing room rather than adding too many competing patterns.
6. Prepare and Pin the Side Panels in Place

Before attaching the side panels, place each piece against the main cover section to confirm that the edges and corners match. Check that the fabric is facing the correct direction, especially if you are working with a directional print. Clip or pin the pieces in place, starting at the center and working toward the corners.
Take your time around the corners because this is where small mismatches can affect the final shape. If the fabric feels slightly uneven, redistribute the fullness before sewing instead of forcing the edges together. Tip: Use sewing clips if your layered fabric feels thick, as they can make the pieces easier to handle and keep the edges aligned.
7. Sew the Cover Pieces Into Shape

With the side panels pinned securely, sew the pieces together using a consistent seam allowance. Start slowly around the corners, keeping the fabric edges aligned as you guide the cover through the machine. Backstitch at the beginning and end of your seams to give the finished cover extra strength.
After stitching, check the seams from both sides before continuing. If a corner looks puckered or uneven, carefully unpick that small section and sew it again rather than trying to hide the mistake later. Tip: Trim bulky seam allowance around carefully sewn corners where appropriate, but leave enough fabric to keep the seams secure.
8. Finish the Bottom Edge With a Clean Hem

Once the main cover is assembled, turn your attention to the bottom edge. Fold the raw edge inward, press it flat, and stitch around the entire opening to create a clean, durable hem. A narrow double fold works especially well for a polished beginner friendly finish.
Keep the hem even as you sew around the cover, especially when approaching the corners. Before finishing the stitching, make sure the opening remains wide enough to slide comfortably over your machine. A neat hem gives the cover a professional appearance and helps prevent the fabric from fraying with regular use.
9. Add Cute Functional Details Like Pockets or Trim

Now you can add the details that make your cover both attractive and useful. A small exterior pocket can hold fabric clips, a seam ripper, measuring tape, or other lightweight sewing essentials. Decorative piping, fabric trim, appliqué, or a contrasting border can also give the cover a custom look.
Keep accessories lightweight and place them where they will not interfere with the machine or make the cover difficult to remove. If you are adding a pocket, stitch it securely along the sides and bottom while leaving the top open. This is where you can have fun with leftover fabric and create a cover that feels uniquely yours.
10. Turn, Test Fit, and Make the Final Adjustments

Turn the finished cover right side out and gently press the seams so the corners and edges look crisp. Carefully place it over your sewing machine, checking that it reaches the desired height and sits comfortably without pulling or bunching around the machine.
If the cover feels too loose, too tight, or uneven in one area, make small adjustments before calling the project finished. Check that the handle, controls, and other raised parts have enough room underneath. Give the cover one final press, trim any loose threads, and enjoy your new handmade sewing machine cover.
Cute Ways to Personalize Your Sewing Machine Cover
Give your sewing machine cover a little personality with simple details that match your sewing space. Keep the decorations practical so the cover stays easy to use and care for.
- Mix coordinating fabrics: Pair a floral print with a soft solid or small geometric pattern.
- Add patchwork: Use small fabric scraps to create a charming quilted panel.
- Try appliqué: Add simple hearts, flowers, initials, or sewing themed shapes.
- Use decorative stitching: Choose a contrasting thread for subtle visual interest.
- Sew on a pocket: Add a handy pocket for clips, scissors, or a measuring tape.
- Add fabric trim: Use piping, lace, or a narrow fabric border for a finished look.
- Personalize with a label: Add a small handmade label with your name or sewing room theme.
“If you enjoy adding handmade personality to your space, these Suncatcher DIY ideas are another easy craft to brighten up your sewing room window.”
Tips for Making a Neat and Long Lasting Cover
A few careful choices can make your cover look polished and help it hold up through regular use. Focus on accurate measurements, sturdy stitching, and fabrics that are easy to maintain.
- Prewash your fabric: This helps prevent unexpected shrinking after the cover is finished.
- Measure twice: Confirm your machine dimensions before cutting any fabric.
- Use lightweight padding: Fusible fleece or thin batting adds structure without excessive bulk.
- Keep seams consistent: An even seam allowance creates a cleaner finished shape.
- Reinforce stress points: Backstitch around seams and areas that receive frequent handling.
- Press as you sew: Ironing seams between steps helps create sharper, more professional results.
- Choose washable fabrics: Easy care materials make dust and small spills simpler to handle.
- Test the fit: Check the cover on your machine before completing the final adjustments.
Common Mistakes to Avoid
Most sewing machine cover problems come from small measurement or construction mistakes. Catching them early will make the project much easier and give you a better fitting result.
- Cutting before measuring: Always measure the actual machine instead of relying on a standard size.
- Forgetting seam allowances: Include them when calculating every fabric piece.
- Making the cover too tight: Leave enough ease for comfortable removal and placement.
- Using bulky batting: Thick padding can make corners difficult to sew and shape.
- Skipping a test fit: Try the unfinished cover on the machine before final stitching.
- Ignoring fabric direction: Check patterned fabric before cutting to keep prints facing correctly.
- Overloading the decorations: Too many trims or heavy embellishments can make the cover less practical.
- Leaving raw edges unfinished: Properly finished edges help reduce fraying and improve durability.
Conclusion
Sewing a sewing machine cover is a simple way to protect your machine while adding a beautiful handmade touch to your sewing space. With accurate measurements, sturdy fabric, light padding, and a few personal details, you can create a cover that is both cute and practical.
The best part is that you can customize every detail to match your style. Save this guide for your next sewing project, choose your favorite fabric, and give your machine a stylish new cover you will love using every day!
“To finish decorating your sewing space, try adding a few DIY canvas art painting ideas to the walls for a cohesive, handmade feel.”
FAQs
Can I sew a sewing machine cover without a pattern?
Yes, you can sew a sewing machine cover without a paper pattern. Simply measure your machine carefully and use those measurements to create the main cover and side panels. This approach also makes it easier to customize the fit for your specific machine.
What fabric is best for a sewing machine cover?
Cotton quilting fabric is a great choice because it is easy to sew, widely available, and comes in countless colors and prints. Canvas and cotton blends can also work well when you want a sturdier, more structured cover.
Should I use batting or fusible fleece?
Both can work well, but lightweight fusible fleece is often easier for beginners because it adds gentle structure without making the cover too bulky. Lightweight batting is another good option if you want a softer, slightly more padded finish.
How much larger should a sewing machine cover be?
The cover should have enough extra room to slide comfortably over the machine without pulling or catching on the controls. Rather than adding one fixed amount, allow a small amount of ease around your measurements and test the fit before finishing the hem.
Can I make the cover from fabric scraps?
Absolutely. Fabric scraps are perfect for patchwork panels, appliqué, pockets, decorative borders, or smaller accent pieces. Just make sure the scraps are clean, compatible in weight, and large enough to create secure seams.