

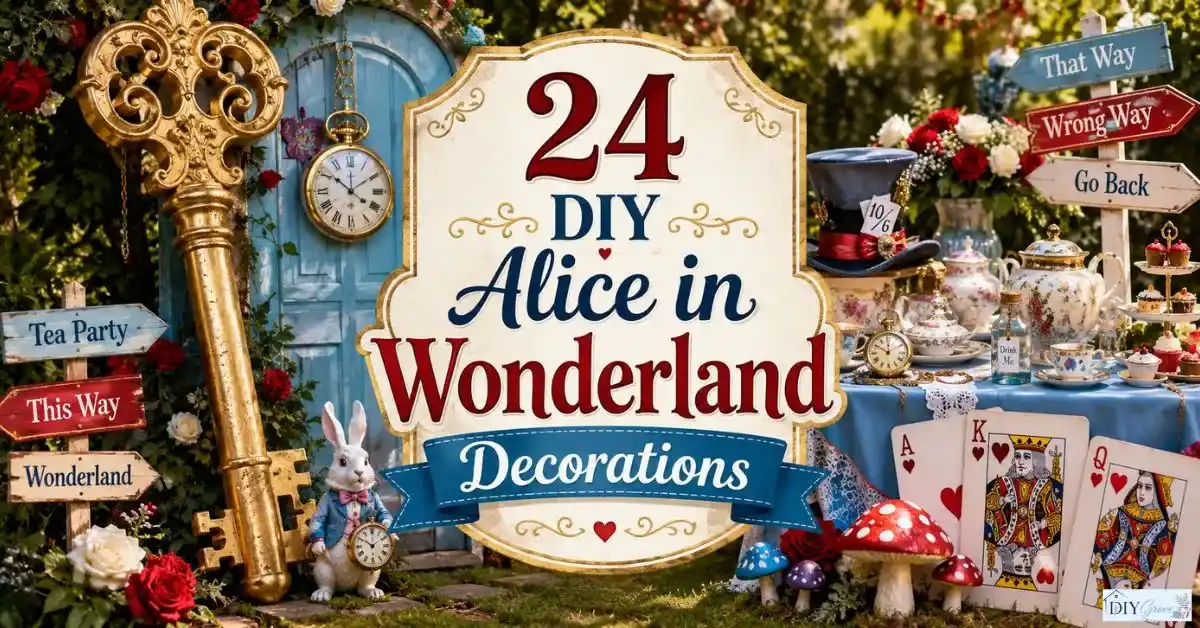
Planning an Alice in Wonderland themed party? These DIY Alice in Wonderland Decorations make it easy to transform an ordinary space into a whimsical world filled with playful details and storybook charm. From oversized golden keys and colorful mushrooms to Mad Hatter tea party centerpieces, playing cards, roses, and magical backdrops, there are plenty of creative ways to bring Wonderland to life.
You do not need expensive party supplies or advanced crafting skills either. With simple materials, clever ideas, and a little imagination, you can create decorations that look beautiful in photos and impress your guests. Whether you are planning a birthday, tea party, or garden celebration, these ideas will help you create a memorable Wonderland atmosphere.
1. DIY Giant Alice in Wonderland Key

A giant Alice in Wonderland key is one of the easiest ways to create an instant Wonderland atmosphere. Its oversized shape makes it eye catching, while gold paint gives it the antique look of a magical key that could unlock a secret door.
You can place this decoration beside your party entrance, against a garden wall, near a dessert table, or beside a Wonderland doorway. It also works beautifully as a photo prop for an Alice in Wonderland themed party.
Materials You Will Need
- Large piece of sturdy cardboard or foam board
- Pencil and ruler
- Craft knife or scissors
- Hot glue gun and glue sticks
- Gold acrylic or spray paint
- Black or dark brown paint
- Paintbrushes
- Decorative gems or metallic embellishments
Helpful Tip: Use foam board instead of regular cardboard if you want a cleaner, sturdier decoration that can be reused for future parties.
The finished key can be attached to a wall, hung from a large ribbon, or placed beside an entrance to make guests feel as though they are stepping into Wonderland.
2. DIY Mad Hatter Tea Party Centerpieces

Mad Hatter tea party centerpieces instantly give a table that playful Wonderland feeling. Instead of using matching tableware, combine different teacups, teapots, saucers, ribbons, flowers, and small vintage accessories for an intentionally mismatched look.
Start with a colorful teapot or oversized hat as the main focal point. Stack a few teacups and saucers around it, then fill the arrangement with faux flowers or curled ribbons. Playing cards tucked between the pieces can add another recognizable Wonderland detail.
For an extra whimsical touch, place a small pocket watch, miniature crown, or handwritten tea tag near the base. Keep the arrangement slightly uneven rather than perfectly symmetrical to capture the Mad Hatter’s eccentric style.
Helpful Tip: Use lightweight faux flowers and sturdy plastic or thrifted teacups if the centerpiece will be placed outdoors or around children.
3. DIY Oversized Playing Card Decorations

Oversized playing cards are an easy way to make any Wonderland celebration feel larger than life. They can decorate walls, entrances, dessert tables, fences, or garden spaces without requiring complicated crafting skills.
Create large card shapes from foam board or sturdy cardboard. Paint each card white, then add bold red or black borders and oversized suit symbols. You can make classic hearts, diamonds, clubs, and spades, or create a few custom cards with Wonderland inspired messages.
Arrange several cards together in different directions for a playful display. For a garden party, push finished cards into the ground using wooden stakes, or attach them to a backdrop with removable adhesive.
For a more dramatic effect, combine the cards with red roses, black ribbon, gold accents, or Queen of Hearts inspired decorations. The contrast between the bright cards and colorful flowers makes this idea especially eye catching in photos.
4. DIY Queen of Hearts Rose Garden

A Queen of Hearts rose garden can turn an ordinary outdoor space into a dramatic Wonderland setting. The classic combination of red and white roses makes the theme instantly recognizable while keeping the decoration elegant.
Use real roses, faux flowers, or even handmade paper roses depending on where you plan to display the garden. Arrange the flowers in clusters rather than placing them in a perfectly uniform pattern. Add small heart shaped signs, oversized playing cards, or miniature crowns between the plants.
For a stronger Queen of Hearts theme, paint a few garden pots red and add white hearts around the edges. You can also place a small sign that says “All Roses Must Be Red” near the flower display.
If you are decorating for a party, position the rose garden near the entrance, dessert table, or photo area. It creates a colorful background while tying several Wonderland decorations together.
5. DIY Painted White Rabbit Signs

Painted White Rabbit signs are a simple way to guide guests through a Wonderland themed space. They work especially well along garden paths, near entrances, or around different areas of an Alice in Wonderland party.
Start with wooden boards, reclaimed wood pieces, or thick foam board. Paint each sign in a soft white or pale blue base color, then add a rabbit silhouette, directional arrow, or playful message.
You can make several signs with phrases such as “This Way to Wonderland,” “Tea This Way,” or “Follow the White Rabbit.” Give each sign slightly different lettering and decoration so the display feels handmade rather than overly uniform.
Add small painted pocket watches, hearts, roses, or tiny gold accents around the edges. For outdoor use, finish the signs with a weather resistant sealer so they can handle moisture and repeated use.
Helpful Tip: Place the signs at different heights and angles along a pathway. This creates a more whimsical Wonderland effect and makes the decorations look great in photographs.
6. DIY Alice in Wonderland Mushroom Decorations

Oversized mushrooms can instantly transform a simple garden or party space into a whimsical Wonderland scene. Create them from lightweight materials such as cardboard, foam, or papier mâché, then paint the caps in bright colors with contrasting spots for that classic storybook appearance.
Place several mushrooms at different heights around flower beds, along a pathway, or beside a tea party table. Mixing red, blue, pink, and cream mushrooms with greenery creates a playful display that looks especially charming in Pinterest photos.
7. DIY Mad Hatter Hat Centerpieces

A decorated Mad Hatter hat makes a fun focal point for an Alice in Wonderland table. Start with a tall top hat and build an intentionally extravagant design using ribbons, faux flowers, feathers, playing cards, and other colorful embellishments.
Place the finished hat in the center of the table or use several smaller hats around the dessert and tea areas. Let some ribbons or flowers hang over the edges to create the wonderfully mismatched look associated with the Mad Hatter.
8. DIY Giant Teacup and Saucer Decor

A giant teacup and saucer can become one of the most eye-catching decorations at a Wonderland party. Use lightweight craft materials to create an oversized cup, then paint it in pastel colors and add floral patterns, gold accents, or playful tea themed details.
Fill the cup with faux flowers, colorful paper decorations, or lightweight balloons and position it near the entrance, dessert table, or garden seating area. Pairing it with oversized playing cards and roses helps create a complete Wonderland tea party scene without making the display feel crowded.
9. DIY Cheshire Cat Smile Wall Art

A Cheshire Cat smile wall display is a simple way to add a playful Wonderland detail without creating an entire character. Paint the famous wide grin on a wooden board, canvas, or lightweight foam panel using white teeth with purple or pink accents around the edges.
Hang it near a party entrance, dessert table, or photo area where the oversized smile can become a fun visual focal point. Adding a few playing cards or colorful flowers around the artwork can help connect it with the rest of your Alice in Wonderland decorations.
10. DIY Queen of Hearts Playing Card Wreath

A Queen of Hearts playing card wreath combines two classic Wonderland elements into one easy statement decoration. Arrange red and black playing cards around a circular cardboard or foam wreath base, overlapping the cards slightly to create a fuller appearance.
Add faux red roses, black ribbon, and a few gold heart accents around the wreath. Hang it on a front door, party entrance, or interior wall to create an eye catching focal point that immediately introduces the Queen of Hearts theme.
11. DIY Hanging Teacup Decorations

Hanging teacups add an unexpected touch to a Wonderland party and make use of vertical space that is often overlooked. Choose lightweight decorative cups and suspend them with sturdy ribbon or clear hanging material, arranging them at different heights.
Hang the cups above a tea table, dessert station, or outdoor seating area. Add small faux flowers or colorful ribbons to some of them for extra charm, while keeping a few simple so the display does not become visually overwhelming.
12. DIY Wonderland Directional Signposts

Wonderland directional signposts are a fun way to turn an ordinary party space into a journey through Wonderland. Use wooden boards or reclaimed pieces to create several crooked arrows, then paint each one with a different destination or playful message.
Place the signpost near the entrance, garden path, or between different party areas. Mixing arrow sizes, colors, and directions gives the display a wonderfully unpredictable look while helping guests find the tea table, photo area, or dessert station.
13. DIY Oversized Pocket Watch Decorations

An oversized pocket watch is perfect for capturing the White Rabbit’s famous hurry up feeling. Create a large round clock from cardboard or foam board, then paint it antique gold and add bold numbers and clock hands for a vintage appearance.
Hang the finished watch on a wall, doorway, garden fence, or party backdrop. For a more dramatic display, add a long decorative chain and surround the clock with roses, playing cards, or small Wonderland signs.
14. DIY Flamingo Croquet Garden Decor

Bring the Queen of Hearts garden scene to life with playful flamingo croquet decorations. Use pink flamingo lawn ornaments as the main visual feature and create simple croquet hoops from flexible garden materials or painted craft tubing.
Set the game area on a lawn or open garden space, then decorate around it with roses, oversized playing cards, and small Queen of Hearts details. Even if guests never play croquet, the setup creates a memorable Wonderland photo opportunity and gives your outdoor party a fun storybook feel.
“For a fall themed Wonderland event, you could also draw inspiration from these Pumpkin Archway DIY ideas to build a similarly striking entrance arch.”
15. DIY Red and White Rose Garland

A red and white rose garland is an easy way to bring the Queen of Hearts theme into almost any part of your Wonderland setup. Combine faux roses in different sizes with artificial greenery, then weave them together into a long garland that can be reused for future parties.
Drape the finished garland around a doorway, dessert table, backdrop, or garden fence. Keep the red and white flowers slightly uneven for a natural appearance, and add a few playing cards or heart shaped accents when you want a stronger Alice in Wonderland feel.
16. DIY Alice Silhouette Wall Decor

An Alice silhouette is a simple decoration that adds a recognizable Wonderland element without overwhelming the rest of your theme. Cut the silhouette from black cardstock, foam board, or thin wood, then mount it on a contrasting pastel or white background.
Place the artwork behind a tea party table, on a living room wall, or beside a dessert display. Add a few roses, teacups, or playing cards around the silhouette to create a layered scene while keeping Alice as the main focal point.
17. DIY Wonderland Doorway Arch

A Wonderland doorway arch can transform an ordinary entrance into a magical gateway for your party. Build a lightweight arch using a sturdy frame, then cover it with faux greenery, roses, oversized cards, and other Wonderland inspired decorations.
Keep the doorway itself fairly simple so the surrounding details stand out. Add a large golden key, mushrooms, or a small “Welcome to Wonderland” sign to make the entrance feel like a true portal into the storybook world.
Position the arch at the main entrance or use it as a photo backdrop. Guests naturally pause at decorated doorways, making this one of the most useful pieces for creating memorable party photos.
18. DIY Giant Mushroom Garden Stakes

Giant mushroom garden stakes are an easy way to add height and personality to a Wonderland garden. Create lightweight mushroom shapes, paint the caps in bright colors, and attach them securely to wooden or metal garden stakes.
Place the mushrooms at different heights along a pathway, around flower beds, or beside a party entrance. Mixing several colors and sizes makes the garden look more whimsical while helping the decorations stand out among real plants and flowers.
19. DIY Queen of Hearts Crown Decorations

Queen of Hearts crown decorations bring an instant royal touch to an Alice in Wonderland party. Create oversized crowns from sturdy cardboard or foam board, then decorate them with gold paint, red details, heart shapes, and faux jewels.
Use the crowns as table accents, wall decorations, or photo props. You can also place smaller crowns on chairs or dessert stands to create a coordinated Queen of Hearts theme throughout the party space.
20. DIY Drink Me Bottle Display

A “Drink Me” bottle display is a charming way to recreate one of the most recognizable Wonderland details. Collect small decorative bottles or glass containers and add colorful water, faux potion mixtures, ribbons, and handwritten tags.
Arrange the bottles together on a vintage tray near your dessert or tea table. Use different bottle shapes and pastel shades to create visual variety, and surround the display with roses, playing cards, or tiny gold accents for a more complete Wonderland look.
Helpful Tip: If children will be at the party, clearly label the bottles as decorations and use sealed containers or non drinkable display materials to prevent accidental consumption.
21. DIY Eat Me Treat Table Decorations

An “Eat Me” treat table can turn ordinary desserts into a playful Wonderland attraction. Arrange cupcakes, cookies, macarons, and small cakes on cake stands at different heights, then add handmade “Eat Me” tags to make each treat feel like part of the story.
Keep the display colorful but coordinated by repeating a few Wonderland colors throughout the table. Add red and white roses, playing cards, ribbons, and vintage teacups around the desserts to connect the treat station with the rest of your decorations.
22. DIY Curious Caterpillar Centerpiece

A Curious Caterpillar centerpiece adds a colorful character inspired detail to a Wonderland table. Create the caterpillar from lightweight craft materials such as painted foam balls, cardboard shapes, or air dry clay, then connect the sections into a curved body.
Place the finished caterpillar on a decorative base surrounded by flowers, mushrooms, or small teacups. A few playing cards or tiny gold accents can complete the centerpiece while keeping the caterpillar as the main attraction.
23. DIY Wonderland Hanging Butterfly Decor

Hanging butterflies can make a Wonderland space feel magical without taking up valuable floor or table space. Cut butterfly shapes from cardstock, vellum, or lightweight decorative paper, then gently fold the wings to give each one a more dimensional appearance.
Suspend the butterflies at different heights above a tea table, doorway, dessert station, or garden seating area. Mix several colors and sizes, and add a few gold or floral butterflies to create a layered display that looks beautiful from different angles.
24. DIY Alice in Wonderland Photo Booth Backdrop

A Wonderland photo booth backdrop brings all the decorative elements together while giving guests a dedicated space for memorable pictures. Start with a large fabric, paper, or foam board backdrop, then layer recognizable details such as oversized playing cards, roses, mushrooms, butterflies, and a giant golden key.
Leave enough open space in the center for people to stand comfortably without covering the main decorations. Add a few lightweight props, such as a Queen of Hearts crown or oversized pocket watch, so guests can interact with the scene and create more playful photos.
“If a Western themed celebration is next on your party calendar, take a look at these DIY Western party decoration ideas for another fun and easy way to transform your space.”
Materials and Supplies for DIY Wonderland Decorations
Most Alice in Wonderland decorations can be made with simple craft supplies, thrifted items, and a few decorative pieces you may already have at home. Choosing lightweight materials makes oversized keys, playing cards, mushrooms, teacups, signs, and other Wonderland decorations easier to create, move, and reuse for future parties.
Basic Supplies to Keep on Hand
- Cardboard and foam board: Great for oversized keys, playing cards, crowns, silhouettes, and signs.
- Acrylic paint: Use red, white, black, blue, pink, purple, and gold for classic Wonderland colors.
- Paintbrushes: Keep both small brushes for details and larger brushes for backgrounds.
- Hot glue and craft glue: Useful for attaching flowers, ribbons, cards, and lightweight decorations.
- Faux flowers and greenery: Perfect for rose gardens, garlands, wreaths, and table displays.
- Ribbons and decorative fabric: Add color and texture to hats, teacups, bottles, and backdrops.
- Wooden boards or craft sticks: Useful for directional signs, garden stakes, and support structures.
- Playing cards: An inexpensive way to add instant Wonderland character to almost any decoration.
- Plastic or lightweight teacups: Ideal for hanging decorations and tea party centerpieces.
- Decorative gems and metallic accents: Add a royal touch to Queen of Hearts crowns and other statement pieces.
Tip: Check thrift stores, dollar stores, and craft clearance sections before buying everything new. Mismatched vintage items often make Wonderland decorations look more authentic and whimsical.
How to Create a Magical Wonderland Display
Creating a magical Wonderland display is less about decorating every available space and more about combining a few recognizable elements in creative ways. Start with one main focal point, such as a Wonderland doorway, giant key, tea party table, or photo backdrop, then build smaller decorations around it using repeating colors and storybook details.
Simple Display Tips
- Choose a color palette: Combine classic red, white, black, and gold with softer blue, pink, and purple accents.
- Create different heights: Mix floor decorations, table centerpieces, wall art, and hanging pieces so the display has more visual depth.
- Use recognizable details: Playing cards, roses, teacups, pocket watches, mushrooms, crowns, and keys immediately communicate the Wonderland theme.
- Mix textures: Combine flowers, painted cardboard, wood, glass, fabric, and greenery to keep the setup interesting.
- Create a focal point: Make one decoration larger or more elaborate than the others so the display has a clear centerpiece.
- Use pathways: Directional signs, mushrooms, roses, and garden stakes can guide guests naturally from one decorated area to another.
- Leave breathing room: Avoid covering every surface. Open areas help your main decorations stand out and make photos look cleaner.
- Think about photos: Position larger decorations behind tables and seating areas so they create attractive backgrounds without blocking guests.
- Repeat key elements: Using the same roses, playing cards, ribbons, or gold accents in several areas helps the entire Wonderland setup feel coordinated.
Tips for Mixing Alice in Wonderland Colors and Themes
Alice in Wonderland decorations work best when the colors feel playful but still connected. Instead of using every bright color at once, choose a few main shades and repeat them throughout your decorations. Classic red, white, black, and gold create a Queen of Hearts look, while pastel blue, pink, purple, and green can give the setup a softer storybook feel.
Easy Ways to Coordinate Your Wonderland Theme
- Choose three to five main colors: This keeps the decorations visually connected without making the space feel chaotic.
- Repeat your favorite details: Use roses, playing cards, gold accents, teacups, or ribbons in several areas.
- Balance bold and soft colors: Pair strong red or black decorations with pastel blue, pink, or white elements.
- Mix character themes carefully: Queen of Hearts, Mad Hatter, White Rabbit, and Cheshire Cat details can work together when they share the same color palette.
- Combine different textures: Mix flowers, painted cardboard, glass bottles, fabric, wood, and greenery for a richer display.
- Use vintage accents: Antique looking clocks, teacups, keys, and picture frames can give the decorations a more authentic Wonderland atmosphere.
- Keep one area as the main attraction: Let your tea table, doorway, or photo backdrop carry the strongest decorations while keeping surrounding areas simpler.
Common DIY Decoration Mistakes to Avoid
Creating Wonderland decorations should be fun, but a few common mistakes can make the finished setup look cluttered or difficult to manage. Planning your colors, placement, and decoration sizes before crafting can help you create a more polished display without spending more money.
Mistakes Worth Avoiding
- Using too many colors: A large mix of unrelated colors can make the display look messy instead of whimsical.
- Making everything oversized: Choose a few statement pieces and keep smaller decorations around them for balance.
- Overcrowding tables: Leave enough open space for food, drinks, and guests to comfortably use the table.
- Ignoring stability: Secure outdoor signs, arches, garden stakes, and hanging decorations properly so they do not fall or move unexpectedly.
- Forgetting the background: A beautiful centerpiece can lose its impact if it is surrounded by unrelated colors or clutter.
- Using fragile materials outdoors: Choose weather resistant or lightweight alternatives when decorating gardens and outdoor party areas.
- Making every decoration identical: Wonderland is naturally playful and mismatched, so varying shapes, sizes, and patterns can actually improve the overall look.
- Skipping a test setup: Assemble your main decorations ahead of time to see how everything looks together before the event.
Frequently Asked Questions
How can I make Alice in Wonderland decorations cheaply?
Use inexpensive materials such as cardboard, foam board, thrifted teacups, playing cards, faux flowers, ribbons, and recycled jars. Dollar stores and thrift shops are also great places to find pieces that can be transformed with paint and simple decorations.
What colors work best for an Alice in Wonderland theme?
Classic Wonderland colors include red, white, black, and gold, especially for a Queen of Hearts inspired setup. Pastel blue, pink, purple, and green work well for a softer whimsical look. Combining a few of these colors usually creates a more coordinated display.
How can I make Wonderland decorations from recycled materials?
Cardboard boxes can become oversized playing cards, keys, signs, crowns, and silhouettes, while empty jars can become decorative “Drink Me” bottles. Old teacups, fabric scraps, paper packaging, and unused picture frames can also be repurposed into unique Wonderland decorations.
How do I create an Alice in Wonderland tea party setup?
Start with a mismatched collection of teacups, teapots, saucers, cake stands, and colorful tableware. Add Mad Hatter style centerpieces, red and white roses, playing cards, “Eat Me” treats, and “Drink Me” bottles to create a playful tea party atmosphere.
How can I make DIY Wonderland decorations look more realistic?
Focus on small details and layered textures. Use antique looking paint finishes, realistic faux flowers, vintage style props, dimensional embellishments, and slightly weathered surfaces. Mixing handmade pieces with thrifted vintage items can also make the entire display feel more authentic.
Conclusion
Creating DIY Alice in Wonderland decorations is a fun way to turn an ordinary space into a magical world filled with color, creativity, and personality. From oversized keys and playing cards to whimsical mushrooms, tea party centerpieces, and Queen of Hearts details, these ideas make it easy to build a memorable Wonderland setup on any budget.
Pick your favorite projects, add your own creative touches, and start transforming your space today. Save this post for your next party, share it with a fellow Wonderland fan, and bring your magical vision to life!